Input and Output
Output functions explained in this tutorial are only functions for text displaying. Another tutorial will be done for backgrounds.
We will also talk about input which are, well only SNES joypads and multitaps.
The output system is only available for BG_MODE1. If you need it in other mode, you need to develop it.
It is managed via a map of 32x32 characters. The console functions are used to display text.
When you want to display a text, you must specify the x,y coordinates of the text in this map.
You've got two ways to display text on screen :
- using the default map shipped with PVSnesLib (text are sent to display during Vblank)
- using your own map and send it to screen after waiting for vblank with the DMA functions.
The first thing to use the display system is to init the console with the background that will handle the text, and of course, the font to use.
We will see later how to customize the font. PVSneslib is shipped with a default font named pvsneslibfont.bmp. Just take a look at it to know how characters are.
To init display system, just call consoleInitText(0,0, &snesfont, &snespalfont) where :
- the first parameter is the background that will handle the text (0..2)
- the second one is the palette number (0..16)
- the third one is the address of graphics for font converted with gfx4snes
- the last one is the address of palette for font converted with gfx4snes
.. Somewhere where you initialized variables ...
extern char snesfont;

//---------------------------------------------------------------------------------

.. somewhere in the beginning of your main code ...

    // Initialize SNES
    consoleInit();

    // Initialize text console with our font
    consoleInitText(0, 0, &snesfont,&snespalfont);
You can also change the text graphics and map VRAM address by using the functions:
    consoleSetTextVramBGAdr(background graphic address);
    consoleSetTextVramAdr(background map address);
    consoleSetTextOffset(offset of text in background map address);
here is the hello_world example of new vram entries:
    // Initialize text console with our font
    consoleSetTextVramBGAdr(0x6800);
    consoleSetTextVramAdr(0x3000);
    consoleSetTextOffset(0x0100);
    consoleInitText(0, 16 * 2, &tilfont, &palfont);
This is done with the consoleDrawText function, just call it with text coordinates and text value. For example consoleDrawText(5,10,"hello world") to display at column 5, row 10 the text **hello world **.
Also, you can format the string to display with generic format options :
For example, %d is used to display integer like consoleDrawText(1,1,"X=%d",varx) that will display X=10 if varx equals 10.
To display a string, you must use %s and %c for a char.
For example :
char name[32];

  strcpy(name,"PVSneslib");
  consoleDrawText(1,1,"Name of lib=%s",name);
Just take a look at standard printf options of C language to know exactly what you can do.
You can use only two colors, the text and background color with the consoleSetTextCol function. But only text color is important.
Color is designed with the Red, Green and Blue parameters.
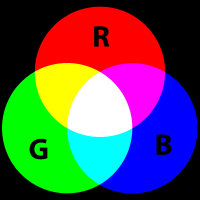
Each parameter must be a number between 0 and 31. And you must call function RGB15 to have the final correct color.
So, RGB15(0,0,0) is the black color and RGB15(31,31,31) is the white color.
For example, to use a red text color with black background, just put :
consoleSetTextCol(RGB15(31,0,0), RGB15(0,0,0));
Basically, a custom font is a tiled background, each tile representing a specific character. Here is a basic custom font layout:

The layout is very important, each character must be 8x8 pixels and only from ascii code 32 to 127.
You also have only two colors, the background color (which is the transparent color) and the font color.
We are not going to use the palette for the text font, but you must know that the background color must be the first color (entry #0) and the text color the next one (entry #1 of palette).
For a more accurate editing, I suggest you to display a grid (8×8 pixels) in your favourite graphics editor, like this (zoomed):

One more thing to know about this layout, it must be compiled with the "non optimized" -R flag of gfx4snes (to avoid lost of characters).
pvsneslibfont.pic: pvsneslibfont.bmp
	@echo convert font with no tile reduction ... $(notdir $@)
	$(GFXCONV) -u 16 -s 8 -o 2 -e 1 -R -m -t bmp -i $<
PVSneslib is able to manage the SNES joypad, the mouse and the SuperScope.
    __--L--_________________--R--__           Button Colors:
   /    _                          \   PAL and Japan    North America
  |   _| |_                  (X)    |   X = Blue         X = Gray
  |  |_   _|  SLCT STRT   (Y)   (A) |   Y = Green        Y = Gray
  |    |_|                   (B)    |   A = Red          A = Purple
   \_________.-----------._________/    B = Yellow       B = Purple
PVSnesLib can handle the two SNES pads, which are identified with number 0 or 1.
To get the values for internal pad management, you must call the scanPads function. It will update the state for the two pads.
Then, let's used the padsCurrent function with the padnumber you want to check. The default one is with number 0.
For example, use a short type variable to do that :
short pad0;
pad0 = padsCurrent(0);
To test is a specific button is pressed, just use the corresponding name :
  KEY_A      for pad A button.
  KEY_B      for pad B button.
  KEY_X      for pad X button.
  KEY_Y      for pad Y button.
  KEY_SELECT for pad SELECT button.
  KEY_START  for pad START button.
  KEY_RIGHT  for pad RIGHT button.
  KEY_LEFT   for pad LEFT button.
  KEY_DOWN   for pad DOWN button.
  KEY_UP     for pad UP button.
  KEY_R      for Right shoulder button.
  KEY_L      for Left shoulder button.
so, you can use if (pad0 & KEY_A) to know if button A is pressed or if (pad0 & (KEY_A | KEY_X)) to know if button A or button X are pressed. Notice that we used the | operator to add different buttons, not the & operator, this is because | is like the adding operation.
Also, if ( (pad0 & KEY_A) && (pad0 & KEY_X) ) (or if ( (pad0 & (KEY_A | KEY_X) == (KEY_A | KEY_X) )) is used to know if button A and button X are pressed.
At least, the pad is refresh during VBL (thanks to VBlank function), so it is no more needed to use scanPads function to refresh pad values.
     // Get current #0 pad
     pad0 = padsCurrent(0);

     // Update display with current pad
     if (pad0 & KEY_A) {
       consoleDrawText(12,10,"A PRESSED");
     }
snes_mouse has to be turned on (snes_mouse = 1). This is set 0 by default after consoleInit().
This will tell the system to read from a mouse, if it is found.
Mouse and pads can be used simultaneously, on any ports. Externs in the pad.h file goes like this:
snes_mouse; /*!1 if Mouse is going to be used */
mouseConnect[2]; /* 1 if Mouse present / mouseButton[2]; / 1 if button is pressed, stays for a bit and then it gets released (Click mode). / mousePressed[2]; / 1 if button is pressed, stays until is unpressed (Turbo mode). / mouse_x[2], mouse_y[2]; / Mouse acceleration. daaaaaaa, d = direction (0: up/left, 1: down/right), a = acceleration. / mouseSpeedSet[2]; / Mouse speed setting. 0: slow, 1: normal, 2: fast */
First, we might use detectMouse() to populate snes_mouse to 1, so It can be called at boot and like this:
if (snes_mouse == false)
{
  detectMouse();
  // some other code you might need in your program, like displaying warning messages and stopping your game.
}
the number inside array specifies port (0 or 1). I recommend using this code structure to convert raw acceleration into usable values:
u16 p1_mouse_x = 0x80;
u16 p1_mouse_y = 0x70;
u16 p2_mouse_x = 0x80;
u16 p2_mouse_y = 0x70;

 if (mouse_x[0] & 0x80)
    p1_mouse_x -= mouse_x[0] & 0x7F;
else
    p1_mouse_x += mouse_x[0] & 0x7F;
if (mouse_y[0] & 0x80)
    p1_mouse_y -= mouse_y[0] & 0x7F;
else
    p1_mouse_y += mouse_y[0] & 0x7F;
And that's most of it. You can look inside the example file (snes-examples/input folder) to have an idea of how you can program Mouse games.
First, we might use detectSuperScope() on boot to detect Super Scope presence. Other way is to force detection by populating snes_sscope to 1 manually, but we dont need to do that if we call this function. We need to call this function everytime Scope gets disconnected from the system, a usefull way to do it is inside this conditional:
if (snes_sscope == false)
{
  detectSuperScope();
  // some other code you might need in your program, like displaying warning messages and stopping your game.
}
Here is a brief explanation of every variable we might be using:
extern u16 scope_holddelay; /*! \brief Hold delay. */
extern u16 scope_repdelay;  /*! \brief Repeat rate. */
extern u16 scope_shothraw;  /*! \brief Horizontal shot position, not adjusted. */
extern u16 scope_shotvraw;  /*! \brief Vertical shot position, not adjusted. */
extern u16 scope_shoth;     /*! \brief Horizontal shot position, adjusted for aim. */
extern u16 scope_shotv;     /*! \brief Vertical shot position, adjusted for aim. */
extern u16 scope_centerh;   /*! \brief 0x0000 is the center of the screen, positive values go to bottom right. */
extern u16 scope_centerv;   /*! \brief 0x0000 is the center of the screen, positive values go to bottom right. */
extern u16 scope_down;      /*! \brief flags that are currently true.*/
extern u16 scope_now;       /*! \brief flags that have become true this frame.*/
extern u16 scope_held;      /*! \brief flagsthat have been true for a certain length of time.*/
extern u16 scope_last;      /*! \brief flags that were true on the previous frame.*/
extern u16 scope_sinceshot; /*! \brief Number of frames elapsed since last shot was fired.*/
for scope_down, scope_now, scope_held, scope_last, we need to mask our bits with this usefull bits:

typedef enum SUPERSCOPE_BITS
{
    SSC_FIRE = BIT(15),     //!< superscope FIRE button.
    SSC_CURSOR = BIT(14),   //!< superscope CURSOR button.
    SSC_PAUSE = BIT(12),    //!< superscope PAUSE button.
    SSC_TURBO = BIT(13),    //!< superscope TURBO flag.
    SSC_OFFSCREEN = BIT(9), //!< superscope OFFSCREEN flag.
    SSC_NOISE = BIT(8),     //!< superscope NOISE flag.
} SUPERSCOPE_BITS;
And that's most of it. You can look inside the example file (snes-examples/input folder) to have an idea of how you can program Super Scope games.